Wednesday, December 9, 2009

Christmas Card Alternatives

We're back again with another Holiday idea for you to try . . .

We know that many, many of you enjoy creating & sending your own cards for the Christmas season.

This year, why not put a different spin on those hand-crafted greetings!
Send out "Holiday Postcards" instead!


Now these will be a little bit more time consuming but they are Oh-So-Cute!
Whoever receives these will surely remember them for years to come . . .and what a surprise to find in the mailbox!

We made ours a 5x7 size, but any standard letter size will work . . . just remember to add a little extra postage!

You'll need just a few basic ingredients for these:
Chipboard
Assorted Holiday Papers
Ink Pad
Stickers, Rub~ons, Stamps, Photos, etc.
Mod Podge
Cut your chipboard to your desired size and adhere (with ModPodge) your chosen papers.


Remember to ink the edges to cover the raw chipboard & give it a bit of a distressed look.


After that, the sky's the limit!
embellish with more paper, stickers, photos . . . . whatever you'd like.

Stamp or print out your sentiment, sign your card and address it.


Your last step will be to give it another all-over coat of ModPodge to seal all of the edges to keep them from coming up.


Super simple and really cute . . . . Have fun with this one!

Monday, November 30, 2009

Christmas Wraps

Hello Everyone!

We're finally back with another idea (altho' not original) for you for your handmade gift-giving this season.

Many of us love to bake & give holiday treats to those we love.
So instead of just handing them a bag of goodies, why not dress it up a little?

Today we're sharing our ideas on presenting those home-made breads we love to make.


These are super simple & quick to put together.
So if you own a sewing machine & can sew a straight line, you're in luck!

To begin all you need are a couple strips of co-ordinating papers.
We cut ours into a 3x12 inch strip and two 1inch strips.


Next we zig-zag stitched the 2 strips on each side of the wider piece . . .


After that, use your imagination!
For this pink one, we used a decorative border punch to finish off the sides before wrapping it around our Banana Bread.


Or try using a scallopped scissors . . .


And don't forget to add a cute tag and some frilly ribbons & bows!!


We hope this post inspires you to create some beautiful wraps of your own this year!

Watch this place for another Christmas idea soon!

Monday, November 16, 2009

Check Us Out!

OK . . .we did it!

The Shoppe is now on FaceBook!


So make sure you visit us & become a fan for the most up-to-the-minute news!

Now you can get updates immediately instead of waiting for a newsletter!

Click on the box up in the corner to join us!


Tuesday, October 27, 2009

Another Halloween Treat

Here's another quick & super simple cute, cute Halloween treat idea!

And there are only a couple ingredients that you'll need . . . . here's the 1st one:

A simple piece of styrofoam . . .


and this is the other thing that I used . . . altho' not neccessary, but it makes it easy!


And here is your first peek at what I ended up with:


Here's the big picture . . . really cute & takes less than 10 minutes (plus glue-drying time)

Now keep in mind that you'll need to round off the corners of your styro piece & glue a grey piece of cardstock to the front. The ghostie goes on the back side.
And it's alot cuter when you add a little pen doodling and some googly eyes.

Then just poke in your favorite lollies and your finished!

Hope you enjoy todays little treat project!

Friday, October 2, 2009

Do You Want Fries With That?


OK, Guys . . . .Here's the next treat project idea we've got for you!

And they're Oh-so-Cute . . . .

So here's a hint:


We've taken out the fries, changed the color, and added candy to ours!


These are cutest when made with double-sided papers (we used one from Fancy Pant's Trick or Treat line). . . . and we wrapped them with ribbon to add a little more ooh-la-la to them.


We've got a template for these here at The Shoppe if you'd like a copy for your own party favours. Just stop by!

And while you're here, grab a few extra sheets to make yourself some of these treat bags . . . . we've got the die for this one . . . it'll take you just 2 seconds to roll thru the machine!


And to send you off for now, here's another cutie-patootie we found . . .


He doesn't involve any paper ~ just some chenille stems (that's a fancy-schmancy word for good ole' pipe cleaners )


Hope this post gives you guys lots of creative inspiration for some special treats for your classroom parties or get-togethers you have planned for this Halloween season!

TaTa until next time . . . .

Tuesday, September 29, 2009

Halloween Goodies

It's that time of year when we begin to start collecting candies and goodies for our children's classroom parties and for the trick or treaters that show up on Halloween.

And we can take the easy way out by just filling some generic treat bags

~OR~

we can take the CUTE way out and make those treats special!

Today we're going to show you how to make some really cute "Sour Cream Containers" using your leftover scraps of papers, stickers, ribbon . . . .whatever you have on hand.

To begin, cut a scrap of paper into a 4-1/4" x 5-1/2" strip.


Using a good, strong adhesive, run a strip down 1 long side and 1 short side of the back of your paper.


Next, roll the paper into a long tube shape and secure . . .


Then pinch the short end shut so that it's flat . . .


Put the flattened end into a paper crimper and crimp about an inch and a half up.


Then fill the paper tube with your fave treat . . . we like Peanut M&M's!


Turn the tube sideways, add more adhesive, pinch the other end closed, and run through the paper crimper again . . .


All that's left is to add a matching ribbon and a tag!


Here's a few more ways to dress up your sweets with leftover scraps . . . .


And don't forget to wrap up those plain candy bars!

We've got a few more ideas up our sleeves for decorating this season, so check back soon!

Tuesday, September 15, 2009

Yard Sale Info

OK . . .the votes are in and a Fall Scrapbook Yard Sale is now on the schedule!

Make sure to mark Saturday, October 10th on your calendar for this wildly, popular event.
This will be our 6th yard sale here at The Shoppe and I'm sure those who come for the shopping will, once again, find a TON of amazing scrapping goodness!

Or if it's time to clean out your stash, you may register for a seller's number. You'll earn 100% of of anything you sell in store credit, giving you lots of play money for the new stuff that's always coming through the doors!

Make sure you get here early on sale day . . . the lines start forming around 7am ~ yes, 2 hours early!

This is what the sidewalk looks like before the doors are unlocked . . .


And then there's a mighty stampede to the cropping area where eager scrappers frantically grab their fabulous finds . . . .
Just to drop a hint of what to expect on the tables: I know there will be 1 or 2 Cricut machines for sale, along with Sizzix, Creative Memories items, and much, much more yummy scrap stuff!

Now remember . . . we WILL NOT be hosting another sale like this again until May or June of next year, so make sure to attend this one, either as a seller or a buyer!

If you would like more info on selling your stuff, please call or email The Shoppe:
706*321*0202
thescrapbook@bellsouth.net

REMEMBER: Your trash is someone else's treasure!

Thursday, August 20, 2009

Wednesday, August 19, 2009

Yard Sale?


Yes, I'm shamefully crawling back.
No, I didn't fall off the face of the earth. . . .just been super busy with 3 custom album projects and the Disney Class Series I started.

Boy! I didn't know there was such an over-whelming need for Disney designs! The classes have been selling out almost instantly and 6 people have reserved seats for ALL of them!

I think we'll be doing another series like this again . . . and soon!

Anyhow . . . Lately we've been having alot of customers asking when the next Scrapbooking Yard Sale is going to be.
We've been hosting them in February, but only once a year.

With so many requests tho', we're thinking of throwing another bash in October for Fall.

Please go to the poll ( at the top right ) and vote . . . It'll really help us determine whether or not we should wait till the winter months.

Thanks Guys
See ya all soon!

Tuesday, July 7, 2009

Public Television

Hey Everyone!

Just a quickie this time!

Go check Shelley's blog & see what she's up to!
Hint . . . a PBS show!

Shelley's Blog

Friday, July 3, 2009

Make Your Own . . . .

We all love the look that epoxy stickers give to our layouts & cards, but using them all the time can get expensive.

So today's Shoppe tip might help get you the same great effect while saving you some $ . . .
We'll show you how to make your own!

Here is your secret weapon . . . . It's called "Aleene's Paper Glaze"


You can use this on ready-to-go flat printed stickers to give them some depth & dimension or try it like we did with punched paper pieces to perfectly match your layout.


Just squeeze it out onto your chosen item, then let it dry & harden . . .
(drying time depends on how thick you coat your pieces)


On this "Cute as a Button" page, we coated simple circles and then punched holes thru it to resemble matching buttons . . . .


This product is also WONDERFUL to use on beach & pool party themes or on bathtime pages . . . It leaves a "wet" look on water splashes & bubbles!

Or you can use it to just highlight certain features here & there, like we did on this wedding layout . . .


So grab yourself a bottle of this handy-dandy stuff and make your own expensive-looking embellies!

Soon you'll be adding a touch of glaze to glimmer up whatever you're working on . . . .


Friday, June 26, 2009

Disney Days

Do any of you recognize the guy in this photo?
**HINT** He's the one responsible for "The Happiest Place on Earth!"

Yep . . . Mr. Walt Disney, himself!
And we know that many, many of you visit his magical amusement park each year, thus taking a gazillion photos of this, that, the other thing and this & that again!

So to help you get those photos scrapped, here at The Shoppe, we're going to start up a "Disney Make-n-Take" series of pages!

These make-n-takes are the perfect way to get your albums finished ~ we do all the thinking & designing for you! All you do is add your pictures!

Here is the 1st set we'll help you create . . . . Pages for the Main Mouse himself . . .
(We're also gonna include a Title Page in this class for you to start your album with!)

Class date is Saturday, July 11th at 1pm


Here is a peeky at one of the design elements on this page . . .

This class has only 4 more remaining seats open so if you're at all interested, PLEASE call to reserve your seat ASAP!

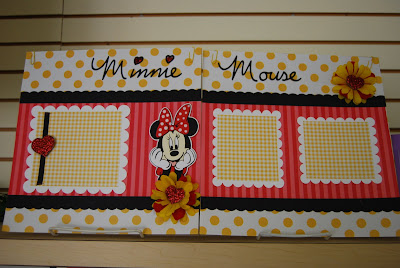
Next up in the series will be pages for Mrs. Mouse (they are married, aren't they?)


And a couple teasers of the elements . . .


Minnie's Make-n-Take date is on the calendar for Saturday, August 1st at 1pm.

Reservations are already being accepted for her too!
Stay tuned for more of your Disney favorites coming soon!

Until then, remember . . . .